Build STEAMy Music Instruments at Home
A MiddleWeb Blog
It could soothe them, energize them, and/or inspire creativity. Music made our hearts happy. (Check out these familiar benefits of music.)
Maybe a music-related project can help you and your kids during these shelter-in-place days. And if you’re a STEM, music or creative arts teacher looking for some “homebound” hands-on activities, give this idea a try.
Make Your Own Homespun Music Instruments!
This STEAM (science, technology, engineering, art, and math) activity features kids, creativity, and musical instruments. This activity can be fun and stimulating if your kids have a real reason for doing this. For example, they might plan to play along with recorded music – including karaoke – that they like.
They may want to create sounds and rhythm to add to a family sing-along. If you play an instrument, your kids could make homespun instruments and join you in creating a cool, in-house band, complete with sound effects. They might even decide to start their own homespun band.
Deciding on a purpose for creating musical instruments will help your kids choose the particular instruments they want to make and will give them a goal to work toward. That’s important.
I’ll throw out some instrument ideas for you to consider, and I promise they will be inexpensive. You probably have the materials on hand already. (Feel free to look for additional ideas at sites like this one, which offers 52 ideas!.) Please note that many of these instruments are easy and simple, so I’ve included some tips to “up” the challenge for middle schoolers.
Percussion Instruments
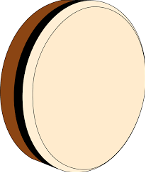
OCEAN DRUM. Create wave sounds and other special effects with this instrument invented in Nepal. (Check it out!)
Get Ready!
Gather these materials:
– A large, sturdy container (pizza box, pie plate with clear cover, closed plastic container, etc.)
– Small objects to move around inside the container: beads, dried peas, beans, rice, sunflower seeds, raw popcorn, etc.
– Glue gun or clear shipping tape
Make it!
Put small objects inside the box. Each kind of object will make a different sound, so experiment to see which you prefer. Also experiment with the amount.
Cut a hole in your container top, if needed, to watch the beads. Tape or glue sturdy, clear plastic securely over the opening. You could use a clear, plastic folder or part of a container that grocers use for holding salads.
For middle schoolers: Make 3 ocean drums using different kinds of materials to produce different kinds of wave sounds. Then investigate: What other kinds of sounds can your drums make?
Use it! Hold the drum in both hands, then tilt and turn it gently in all directions, to hear wave-like sounds. Experiment with other ways of moving the drum to produce other kinds of sounds. Different speeds produce different sounds.
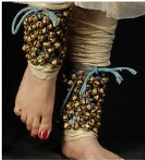
GHUNGROO. These Indian ankle bells produce musical special effects (Check it out!). These small metallic bells are strung together and tied around the ankles. You could also make wrist bells.
Get Ready! Give ‘em these things:
– Wide ribbon or strip of felt at least 2” wide
– Jingle bells (a bunch)
– Scissors
– Needle and thread
– Glue gun if needed
No bells on hand? Metal washers, screws or bolts would give a metallic sound. Repurpose beads or bits from holiday decorations? Or try uncooked pasta like macaroni or penne for a different sound. Kids can also brainstorm things that can make a jingling or rattling noise.
Make it! Cut a strip of fabric to fit loosely around your ankle (or wrist) with a ¾” overlap. Sew on or otherwise attach jingle bells. Stick the Velcro at each end on the same side as the bells. Use a glue gun if needed to secure the Velcro. Note: You can make a simple version of a ghungroo by threading yarn through the bells and tying them around your ankles.
Use it! When you need jingling sounds for your musical production, firmly tap your heel or move your feet in time to the music. (Check it out!)
For middle schoolers: Make two ghungroos – one for each ankle. Practice stepping in ways that cause the bells to jingle differently. For example, try a heel/toe tap, sidestepping, marching, etc.) Then decide how to use the ghrungroos in your homespun musical production.
SHAKERS. Shakers are super easy to make and create different rhythmic sounds in music. (Check it out!) They are made of containers partly filled with small, loose objects that collide with each other as you move them.
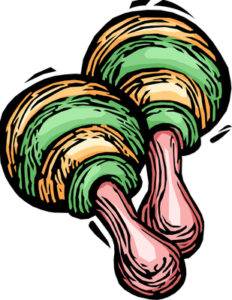
Make it! Challenge your kids, especially middle schoolers, to design a series of shakers that create different rattling, clicking, and jingling sounds. Encourage them to research, brainstorm, and come up with clever ideas. They can include jingle bells and maracas if interested.
Use it! Practice different ways of holding and moving the shakers to produce cool sounds. (Check it out!) Watch this video to learn real shaker strategy. Experiment, experiment! Then choose sounds for your musical production, and make other shakers if needed.
Melodic Instruments
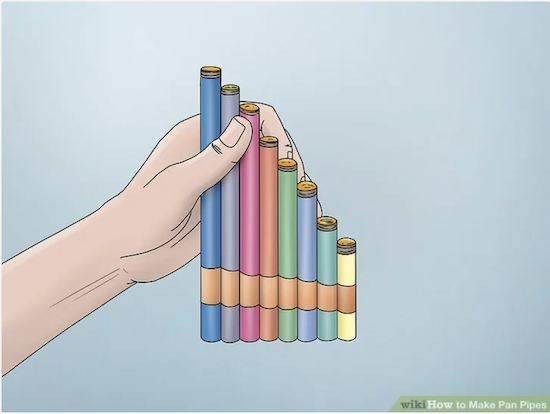
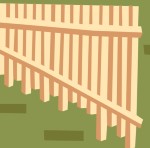
ZAMPONAS (panpipes) are wind instruments that make a soft, pleasing sound when you blow across them. They are made of a series of pipes of that gradually increase in length.
Get ready! Get these:
– Scissors
– Tape
– Ruler
– 8-inch piece of sturdy cardboard
– modeling clay (needed for middle school version)
Make it!
Make your straws different lengths. Don’t cut the first straw; then cut one inch off the second straw. Make each straw one inch shorter than the previous one.
Attach the straws to the cardboard with tape from longest to shortest. Leave about one inch between the straws. Or . . . you can simply place the straws side by side, line up the bottoms, and hold them together with tape.
For Middle Schoolers: Follow the directions for making straw pipes at this WikiHow site. Your pipes will have a more accurate range of sound.
Use it! Put a straw against your bottom lip. Pucker your lips and blow across the straw. Adjust the position of the straw until you make a sound. Now blow across the next straw. Notice the differences in the tone. Practice blowing across the straws to create a simple tune you can play with your homespun band.
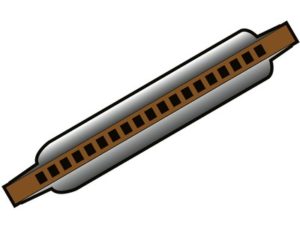
HARMONICAS, also known as mouth organs, make a thin reed sound and are used in many types of music – most commonly the Blues.
Get Ready: Give them:
– 2 Rubber bands
– A strip of paper the same size as the Popsicle Stick
– 2 Toothpicks cut just wider than the Popsicle Stick
Make it! Gather the materials and follow the directions here. (Check it out! This video shows how to make the harmonica described in this activity.)
For middle schoolers: Try making this harmonica instead, using the materials listed at the site. The illustration there shows a finished harmonica, with four straw pieces alternating above and under a rubber band to produce different tones. (Don’t blow on the straws.)
Use it! Producing sounds on this instrument takes practice. You will not sound like this! Use your homespun harmonica for special sounds that add interest to music your band creates. Experiment with sounds you can make.
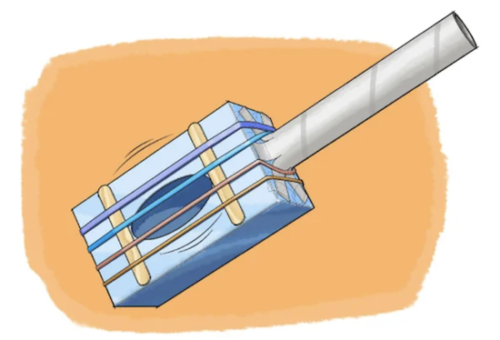
GUITARS date back 4,000 years. These popular instruments are played by plucking or strumming the strings while you press them against frets on guitar’s neck.
There are a lot of ways to make homespun guitars. For example:
Get Ready! Your guitar designers need:
– Four rubber bands of varying thickness but the same length
– Glue gun
– Shipping tape
– Empty tissue box
– Scissors
– Two large craft sticks
– Empty paper towel tube
Make It! For middle schoolers: the rubber band guitar pictured above is from a Scientific American article which offers information about guitars and what produces their sound. Challenge your middle schoolers to read the information and share points they find important with siblings and you. You may need to help younger kids with the instructions.
Use it! Pluck the rubber bands. Notice the tones your guitar makes when you pluck different strings. How does the sound change when you press a string against the tissue box and pluck it? Now, decide how your guitar can add to your music production.
All Together Now!
Now that your kids have made some homespun instruments, let them experiment with them and plan how to incorporate them into their musical production. Then have at it and enjoy the music! Kids with a purpose and creative opportunities can do amazing things. One of mine became a professional musician!
