Prepping for My Next Google Classroom
By Kathleen Palmieri
 As the new school year approaches, I’ve spent a great deal of time organizing files, cleaning out, and redesigning my physical classroom. Now I am organizing my digital files and redesigning a fresh new Google Classroom.
However, before creating a new Google Classroom, I need to ensure that I’ve completed a few important tasks that I will detail below.
Leftovers and Exemplars
Prior to archiving my classroom, I need to ensure that all work has been returned to my former students. There are two ways that I can do this. One way is to click into my Google Classroom where I will see four sections listed: “Stream,” “Classwork,” “People,” and “Grades.” I choose “Grades” and check that all work has been returned.
To return any work, I’ll click on the three dots next to the assignment title and choose to “Return all.” This can also be done by going to my Google Classroom screen (classroom.google.com) where I can see all of my Google Classroom tiles. Above the tiles I can select from “To Do,” “To review,” and “Calendar.” I click on “To review” and check for any unreturned work.

However, prior to doing this, I need to decide on any student work I’d like to save as exemplars for future lessons and make a copy. Once I delete a student from my class, I will no longer have any access to their work.
Under the Classwork Tab
The next two areas that I recommend cleaning up can be found by clicking the “Classwork” tab. There you’ll notice in the upper right corner of the screen “Go to Google Calendar ” and “Class Drive Folder.”
First click on Google Calendar to see a calendar for each class. Next to each class are three dots with options to “Display this only,” “Hide from List” or “Settings and sharing.” You can “Hide from the list” or choose “Settings and sharing,” scroll to the bottom, and delete from the calendar.

You can create a new folder within the master folder to use for organizing – name it “Archive 2020-2021” or something similar. This is where you can move the assignments from that year. Also, create a subfolder for any Exemplary Work you copied/saved for ease in retrieving later.
I highly suggest not deleting old work because as a Google Suite for Education user, you have unlimited space, and once work is deleted it is gone forever.
You can also access your classroom folder by going into your main Google Drive interface and find the folder “Classroom.” To create an archived subfolder from this entry point, click on the menu triangle to the right of “Classroom”, choose “New Folder” and save with an appropriate name. Now you can move other classroom folders into this archive folder. Repeat this process to create your “Exemplary Student Work” folder.
Using the Old Classroom as a Template
I recommend making a copy of your classroom from last year before archiving to help build your new Google Classroom. I am going to use my copy as a template for my new class, so I’ll name it “Template.”
My template will have no people or announcements, but the assignments, topics, resources, etc. that I previously posted are now saved in draft form. While I can see them in my teacher’s view, students would not be able to see them until I choose to assign them.
After I create my template for 2021-2022, it’s time to archive my old classroom. I can always get to my archived classes from the upper left menu, scrolling down to “Enrolled” and clicking on “Archived classes,” then “restore.” You can also choose to “reuse (a) post” by going into the menu and choosing the assignment.
Now I am able to use my template to create a new school year Google Classroom. By closing out my previous classroom, I’ve also had time to review what worked and what I will be sure to do in the new classroom. Here are a few items on my list of things to keep me organized, avoid digital clutter, and save time:
► LESSON LEARNED: Hide notifications for assignments on the stream
Go to the Settings gear icon in the upper right corner and scroll down to “Classwork on the stream” and choose to “hide notifications.” The only items I have on the stream are my announcements. Students will learn that all assignments will show up under “Classwork.”
► LESSON LEARNED: Limit student activity on the stream
While in settings, go to “Stream” and limit what students can do by choosing “Students can only comment.” Otherwise, students will be able to create a post and comment which can be problematic. Also, if allowing comments becomes a problem, you can choose “Only teachers can post or comment” at a later time.
► LESSON LEARNED: Labeling within “Classwork”
There are varied opinions on how to label topics within your Google Classroom. One idea is to label using weeks, such as “Week 1:” and then a date range. Teaching fifth grade students, I prefer to use topics such as “Writing,” “Social Studies,” “Resources,” etc. Here is an example of topics from my Math Google Classroom:
- Math Games
- Bitmoji Math Classroom
- Mini-lessons
- Math vocabulary
- Exit Tickets
- Jamboard
- Math Antics
- Special Assignments
►LESSON LEARNED: Creating a comment bank
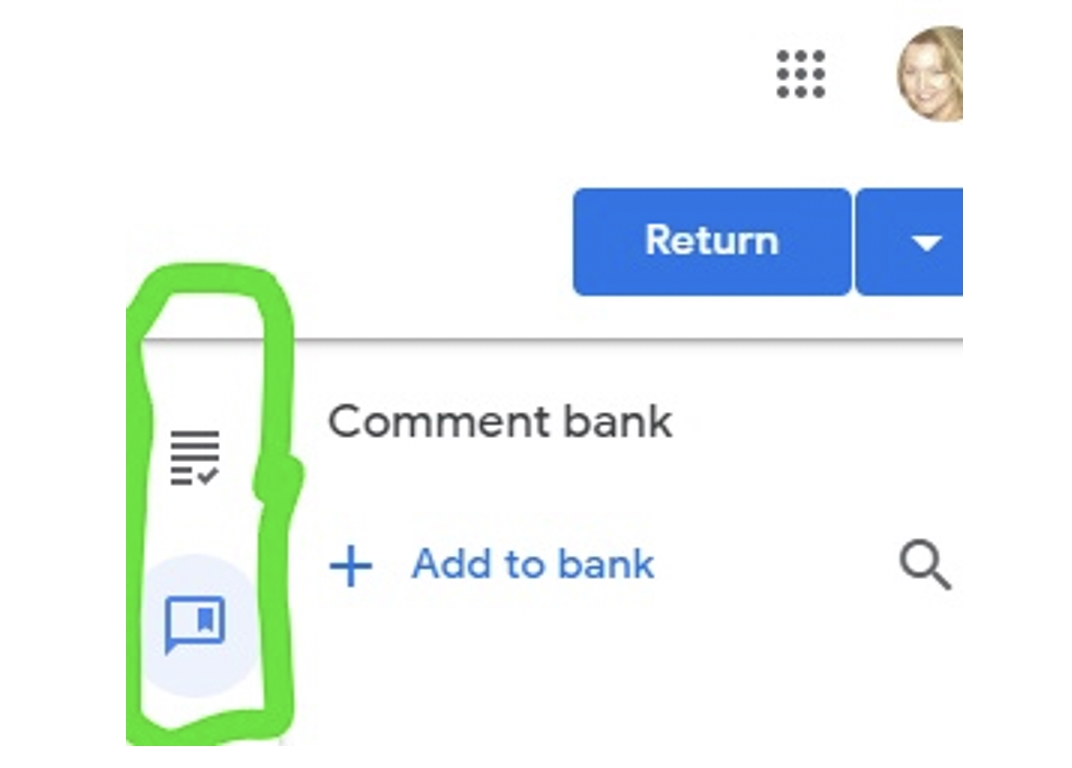
Click on the icon and it will open your Comment Bank. Click on the plus sign “Add to Bank”; it will bring up a dialogue box where you can add a comment or multiple comments to your bank. Simply type in each comment that you want to save for later sharing with students in separate lines in the comment box then click add.
If you are creating a longer comment, just keep typing. It will save it as one comment until you create a manual line break. Once you have a line break, each of the lines will come in as a separate comment.
As the school year unfolds and you type a comment you want to use again, simply click on the three dots within the comment box and choose “Add to comment bank.” To use it again, simply highlight text, right click, choose “comment” and type in a “#”. Then you can choose your comment from those you’ve saved. This is a great timesaver when grading!
Checking what my students will see
Finally, once I have my Google Classroom set up, I like to sign in as a student from my other (personal) gmail account. This helps me see how the classroom will appear to my students.
Once I feel my Google Classroom is complete, I will create a fun scavenger hunt as a beginning of the year activity for my students to help them become familiar with how to navigate my Google Classroom.
For more about Google Classroom basics, visit Google’s Help pages.
You can also search for teacher-made help videos on YouTube. Example.
Kathleen Palmieri is a National Board Certified Teacher and NBCT Professional Learning facilitator. She is a fifth grade educator in upstate New York who reviews and contributes regularly for MiddleWeb. With a passion for literacy and learning in the classroom, she participates in various writing workshops, curriculum writing endeavors, new teacher induction development, and math presentations.
As a lifelong learner, Kathie is an avid reader and researcher of educational practices and techniques. Collaborating with colleagues and globally on Twitter @Kathie042500 and expanding her education adventures at www.kathleenpalmieri.com are ongoing practices.


