Anatomy of a STEM Lesson
For some years now, I’ve been involved in writing STEM curriculum modules. The modules, developed with support from a National Science Foundation grant, are designed for 3 to 5 days, with math and science thoroughly intertwined around the engineering design process. (These modules are written by a team of writers, BTW, not just me.)
The math and science teachers who implement each module go through professional development together, and their students should have a seamless experience as they travel from math to science classrooms, working on their engineering challenge.
Recently I’ve also been partnering with Caroline Goode who is (among other things) a teaching eMentor for a joint project of the National Science Teachers Association and the New Teacher Center. Caroline (who answers to “Cal”) and I are writing STEM lessons for middle school science and math teachers in the Mobile County (AL) Public School System, with the talented staff of Engaging Youth through Engineering facilitating this effort. For this particular STEM initiative, the science and math teachers do not collaborate on the same challenge, although each challenge includes all four STEM core areas.
The Kick-off
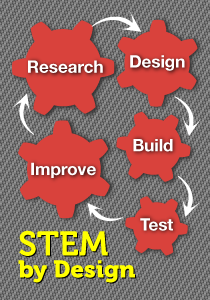
In the NSTA/NTC work, we start each round of lessons by working with selected math and science teachers from a particular grade level. Together we map out the math, science, and engineering objectives for the quarter. Then we start brainstorming ideas. When we settle on a challenge, we match that to the engineering design process (EDP). More preliminary work goes into this, but I want to show you an example of a lesson that’s been developed using the EDP as the frame. So let’s cut to the chase.
The Challenge: Stop the Drop!
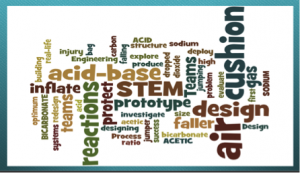
So the question was: What real world challenge might we come up with that involves chemistry, scatter plots and line graphs and focuses on designing technologies or systems to solve practical problems in society? We needed to address a real-world issue. Here’s what the teachers decided:
Engineering is used to design technology to meet human needs, including methods of keeping people safe. Today, airbags are at the forefront of the effort to keep automotive travelers safe. What if airbag technology could be expanded to create something that could help rescue people who are trapped in burning buildings or in other high structures? This challenge (Stop the Drop!) focuses on designing an air cushion that would safely catch and protect a person jumping or falling from a building.
Mapping the Lesson to the EDP
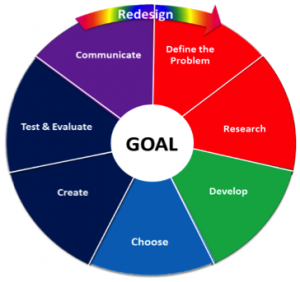
GOAL: Design and develop an air cushion that will successfully prevent injury to a person falling from a building or other high elevation. Obviously the teams can’t actually test this on a person, so the problem they work with must be more specific than that.
PROBLEM: Design and create a prototype air cushion using safe chemicals to inflate it enough to protect an object dropped from a height of 1.5 meters. To launch this challenge, kids watched a 30 second video clip that shows how airbags play a role in safety. Several good choices were out there, but we used this one.
RESEARCH: Investigate current airbag technology and how an acid (acetic acid, or vinegar) and a base (sodium bicarbonate, or baking soda) react to produce a gas (carbon dioxide) that will inflate a bag. Team members researched this on the Internet. I also made a handout with the information in the event that a class did not have Internet access.
To start students thinking about how they might use baking soda and vinegar, teachers showed this engaging 2-minute video.
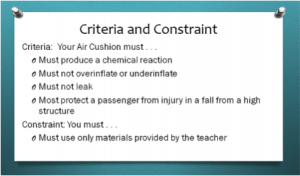
DEVELOP: Brainstorm how to determine the ratios of acid–base combinations that produce the needed amount of gas to deploy their air cushions. We set some criteria and constraints (see graphic). Then we provided each team with a tub of materials (baking soda, vinegar, gallon-size zip-seal bag, metric ruler, paper cupcake liners, string, a plastic portion cup, etc.). Teams brainstormed and tested different ratios of these chemicals, and measured results (how much the different ratios cause their bag to inflate). We gave them these instructions.
CHOOSE: Decide on the system your team members believe has the most effective ratio of chemicals to inflate the air cushion based on plotting and estimating data from a line graph. Team members agreed that they were unlikely to stumble on the best ratio(s) by accident, so how could they use math to help them? They made a scatterplot of their data points; then informally fit a straight line as close to their data points as possible. From the graph they estimated the amount of sodium bicarbonate they would need to construct an air cushion that would be inflated just the right amount. (It’s not magic, but it gives them a starting point for making a choice about the ratio they will use.)
CREATE: Construct a prototype of your chosen air cushion system using the amounts of baking soda and vinegar you believe to be optimal. Each team only got to construct one prototype, so they wanted to get it right.
COMMUNICATE: Discuss the results of the test with other team members. What were the results? Did the faller survive? What worked well? What could be improved? As usual, we reminded teams that they have not “failed” if their prototype doesn’t pass the test. They have “learned.” Like good engineers, they will use what they learned to design another prototype.
REDESIGN: Redesign your air cushion deployment system so that it will more efficiently protect a person falling from a building or other high structure. As time allows, student teams can repeat elements of the design process as they use their data and observations to improve their prototype.
COMMUNICATE: Make recommendations for a follow-up redesign and produce a report. Ask each team to choose one air cushion protection system prototype from the class tests that they think is the most promising in terms of results and cost efficiency (the air cushion that took the least amount of soda would be considered the most cost efficient) and propose ideas for the next redesign. The report the teams produce could be written, oral, in the form of a panel discussion, etc. It could be posted on the class website as a blog or a video.
So that’s the basic idea

Please ask questions about what I’ve described here if you don’t find I’ve provided all the information you need to get a clear picture. Also keep in mind that this is a rather quick STEM lesson designed for a particular need/situation. There are more comprehensive lessons, longer lessons, and certainly better lessons.
My goal in this post has been to walk you through some of the basics of using the Engineering Design Process to successfully incorporate STEM components into math and science learning objectives. It’s not really so hard, is it?

